
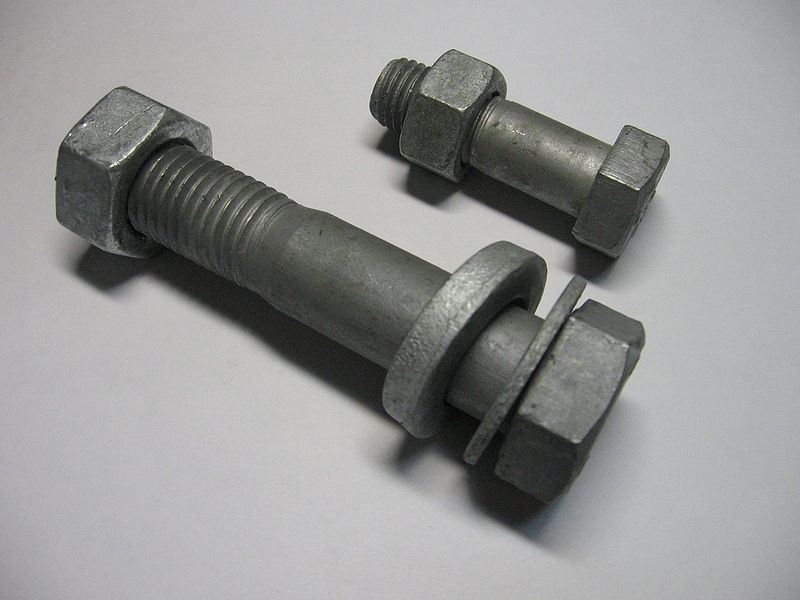
Nothing affects the properties of a material quite like temperature. Think of your own body and the constant need to regulate the temperature it is exposed to in order to function well. Although we’re not going to put a parka or Bermuda shorts on them, temperatures also affect fasteners in a big way. And in the design and construction phase we need to take those effects into account. What works for fasteners like Hex Bolts may not work for Hex Head Cap Screws. Not all Nuts and Bolts are created equal.
The key is to understand which materials are best in which situations.
Potential Problems
Obviously the thermostat swings both ways. There may be instances or prolonged exposure to extremely high heat (such as in an engine) or your design may call for resistance and strength in very low temperatures (such as exterior applications in a northern environment). Each circumstance could potentially cause the fastener to weaken or seize, as well as affect the plating and coating.
Heat can bring on oxidation and both extremes present the danger of corrosion. Basically, your fasteners need to able to handle the temperature or they will break down and fail.
High Heat
Most nonferrous (or those that do not contain iron) fasteners should be avoided in high temperatures. Plastics are out. Choose medium carbon (Grade 5 fasteners, for example) or low alloy steel for hot temperatures up to 450 degrees. But if your application is pushing above that range you will need to opt for a stronger material and possibly even move into heat treatments.
For conditions ranging between 450 and 900 degrees stainless steel is a great option. You’ll also be handling corrosion resistance with this option, although steel containing chromium-molybdenum can also be used.
From 900 degrees on there are super alloys that are specially developed for resistance and stamina. Inco 718 and A-286 are recommended up to 1200 degrees and fasteners made from nickel-cobalt alloys can withstand heat to 1600 degrees.
Heat Treatments
Ferritic steel (which covers steel that is mainly made up of ferrite and contains some chromium) are heat treated for strength in extreme temperatures. The process is somewhat different for each grade of steel, but generally the material is cooled to a low temperature, reheated to refine the grain and then quenched in liquid or normalized in air before being reheated for tempering.
There is a stated minimum temperature for the tempering process that ranges from 1100 degrees to 1200 degrees Fahrenheit, depending on the grade. Also, certain grades stamped with B6 and B6X are held at the tempering temperature (not that’s a tongue twister) for at least one hour. If the material is stress-relieved after tempering tests are necessary.
Stainless steel is treated in a slightly different way. The material is cooled then reheated, held there until the chromium carbide forms a solution and then cooled (in air or liquid). This process will result in a Class 1, 1B or 1C fastener. When a 1A class is needed the material will also be treated with a solution once the heating and cooling processes are done.
Extreme Cool
In certain circumstances your fastener may be exposed to prolonged cold. In consistent temperatures below minus 30 degrees there will be problems with toughness and ductility and the metal can become brittle. This means that materials that are notch sensitive shouldn’t be used in extreme cold, materials like low carbon steel (Grade 2 fasteners, for example).
Nickel-rich grades like AISI 4340 and 8740 can be used if the temperature stays above – 100 degrees Fahrenheit. For frigid conditions between -100 and -300 degrees Fahrenheit stainless steel is your best bet. Non-metallics have a chance to shine in cold temperatures, especially Teflon. Also alloys like Unitemp 212, Inco 718, Waspalloy and A-286 stand up to extreme cold. Interestingly enough, these same alloys also stand up to extremely high heat (up to 1200 degrees), creating a high demand in these unique circumstances.
Temperatures affect different fasteners in different ways. With some basic knowledge you can make a good choice, something that will stand up to whatever the surrounding climate throws at it. Research steams ahead at full power thanks to space exploration, where extreme temperatures take on a whole new level. But those of us still down here on earth are grateful for the information and data that helps us to make strong, dependable choices.
Stainless steel is a widely popular metal used in various applications such as Fasteners. Both commercial and residential projects hold up better with stainless steel fasteners behind the scenes. There are certain alloys used to make up stainless steel that provide the levels of corrosion resistance you can count on. Some of the stainless steel fasteners available are Nuts And Bolts, Hex Bolts and Hex Head Cap Screws.
As a simple definition, stainless steel is any ferrous alloy containing at least 12 percent chromium. It always has iron content and often contains carbon and other alloys, but chromium is the essential element that offers a rust free, stainless finish.
Characteristics of Chromium
Chromium does not corrode. So the more chromium that is in any type of stainless steel (and there are hundreds of different types), the more resistant to corrosion that mixture is. Adding other alloys will increase or decrease the level of resistance, but the mixtures can be balanced to create a strong metal that can handle extreme temperatures, pressures and levels of moisture.
Adding carbon for example, decreases the corrosion resistance and more chromium is needed to bring it back to the expected levels. When nickel is thrown in the mix the stainless steel becomes stronger and highly stable in both very low temperatures and extremely hot conditions.
Why Don’t Stainless Steel Fasteners Rust?
Stainless steel forms a super thin layer of invisible oxide immediately. This spontaneous film is on the exposed surface of the fastener and acts as protection against oxidization, making it impervious to rust even in very moist conditions like marine applications.
When stainless steel fasteners are machined tiny pieces of other metals can attach to the surface, causing imperfections and eventually staining and corrosion. To protect the fasteners and provide the bright finish that is a trademark of stainless steel, these fasteners need to go through passivation before being shipped out to the consumer.
Explaining the Passivation Process
Passivation is the process of immersing stainless steel into a bath of nitric acid and water. This immersion will remove all of the other metals that have been caught on the surface, effectively washing the steel and bringing it back to the original condition. Once the metal is taken out of the liquid, it will again form the protective layer of oxide and reach the full level of corrosion resistance once more.
Various Stainless Steel Groups
Stainless steel is catalogued by three major groups and one hybrid including:
- Ferritic stainless steel – this group makes up around 5 percent of the stainless steel fasteners on the market. It is magnetic and has the least amount of corrosion resistance.
- Martensitic stainless steel – around 10 percent of stainless steel fasteners are made from this type which is very strong and also magnetic.
- Austenitic stainless steel – the most common type that makes up about 80 percent of the stainless steel fastener products, this group is highly corrosion resistant and non-magnetic.
- Precipitation Hardening stainless steel – gaining in popularity, this hybrid group creates a balance between the rust protection of austenitic and the strength of the others.
These groups all have benefits and drawbacks and each will suit different applications. All stainless steel fasteners have a high level of corrosion resistance thanks to the chromium content. They will continue to dominate the commercial and residential construction markets due to the level of reliability and strength they offer in a wide variety of circumstances.
Let’s face it, you’re pretty darn handy. DIY projects are right up your alley and the local home improvement store happily feeds your addiction to all things building related. Now it’s time to put your hard earned skills to good use. It’s time to save the world wearing a tool belt, safety boots and stocked with different types of Fasteners such as Hex Bolts and Hex Head Cap Screws. And to get you started here are some tips for building that solar panel you’re dreaming of.
Counting the Benefits
Solar energy is not just a new fad. Capturing energy from the sun has been around for awhile (remember those solar-powered calculators you had in high school?), but with the mass commercialization in the industry, homeowners are now able to build a panel themselves. The market is exploding and with it comes the ability for you to create a dependable, environmentally friendly source of energy.
Your house can be “off the grid” and your family more self-sufficient. Electricity could cost you less, while being more within your control. And if you’re lucky enough to have a remote property or cottage that has no access to hydro lines, solar panels can get your lights on. What’s not to like?
The Basic Necessities
You can build your solar panel a few different ways. Get yourself a kit with thorough instructions and most of the materials if you’re feeling at all intimidated by the process. There are a bunch of brands out there that will walk you through the project and deliver a solid, well made system you can be proud of. There are kits ranging in size from 5 watts (the Mini-Me of solar panels) to a more impressive DIY 40 watt solar panel kit. Look for a manufacturer that offers a decent warranty and makes a few different sizes.
You could also pick up a guide and build one yourself from scratch, so to speak. They range from the really straightforward to the slightly more technical – check out your local bookstore for a decent selection. Essentially you’ll be building the frame and fitting in PV panels (which is the majority of the expense in such solar projects). From there you need to connect the panels together, run wiring to the batteries and ground the system. Connections are made between the battery and the inverter and if you’re going that way, back into the grid. Trust me, the guides will make it a little more complicated than that.
Grounding Is Essential
No matter how it’s put together, your solar panels need to be grounded properly to prevent damage from electrical faults or lightning. Well designed systems are always well grounded. Use quality solar panel grounding hardware to do this job right.
Depend on Your Sealant
Homemade solar panels need to be sealed well to protect from the elements seeping in. It’s best to make sure everything inside the panel is working properly (especially when you’ve put this thing together yourself) before sealing. That way you can replace faulty parts and make repairs without having to break any seals, which can be a messy job. Again, sealants will keep out the wind and water, and even help seal out fire threats to some degree – an important element in solar panel design and key for durability.
Choose Hardware That Will Last
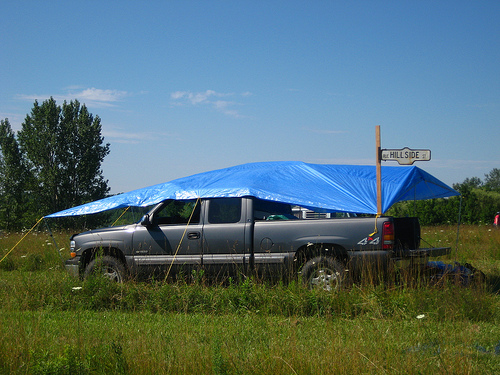
Solar panels take a lot of heat. And a lot of rain, wind, snow and sleet too. These panels are exposed to the worst weather and need to be built with the toughest components possible. You may need to spend a few more dollars, but in the end, good quality materials are well worth it. Aluminum is a corrosion resistant material that does well outdoors, is lightweight (another plus in solar panel construction) and readily available. Choose aluminum mounting brackets, clamps, clips and splices plates.
Your best bet for nuts and bolts is stainless steel, providing the strength and durability you need to build it and forget it.
This project will be a major accomplishment and something you can brag about for years. A well built solar panel will save you money, save the planet and save your pride. Alright, maybe your pride is still healthy and strong, but who doesn’t want to tackle another project that’s exceptionally challenging and extremely rewarding? I know you’re up for it.
You know the type. They work hard, they play hard… and they can be hard to buy for. Contractors are looking forward to taking a few days off this season, but how can you make their holiday complete? With the perfect gift, of course.
And in the spirit of the season we at FastenFinder have wracked our brains to come up with a list of the top five gifts for the contractor in your family. Get shopping with these gift ideas in mind, and look forward to a serious bear hug come Christmas morning.

Warm and wicked work gloves.
1) Warm Workwear – How would you feel if your office was out in the blowing snow of mid-January? Contractors work hard all year long and they deserve a chance to get warm while they’re out there. Lined work pants, heavy duty work gloves and even hats will be greatly appreciated. Nothing frilly and absolutely no plaid scarves, please.

Techie is the new sexy.
2) Techie Toys – Communications have gone high-tech on the construction site, too, so keep your contractor up-to-date with the latest in techie gadgets. A smartphone or tablet can help them with tons of business stuff, as this list of apps shows, not to mention the fact that these things are just plain fun.

Give them an easy caffeine kick.
3) Single Serve Coffee Maker – He or she may not be a coffee snob, but there is no dealing with him or her until they’ve had their morning java. Why not speed the process along with a quick brewing single serve coffee maker? These magical machines allow them to choose their fav hot beverage and will be a great addition to your kitchen counter.
Look for something a little more up to date...
4) Inspiring Literature – We’re not talking Hemingway or Twain here. What they want is a subscription to a trade magazine (that they don’t get at the office) or a guidebook for fun weekend projects. Branch out from what they do everyday – get a woodworking contractor a book on stone or an electrician something about home improvements. The IFI guide is super handy for anyone that wants to learn more about fasteners (but you could just bookmark this blog too… it’s much cheaper).
This contractor needs a garage.
5) Something Big They’re Saving For – A truck rack, that workbench expansion, a screw gun for deck screws – if there is something for their work that they haven’t bought yet (hey, it has been a tough couple of years), gather your pennies and buy it for them. They’ll be amazed, touched and doggone grateful, guaranteed. Just keep the receipt, too.
And from our families to yours, have a wonderful holiday season. Merry Christmas!
When the whole family rolls into town for the holidays, your house needs to look tip top. Besides clearing the clutter and making sure those ratty sheets and towels are replaced, there’s usually a list of holiday home improvement projects to tackle. It’s a good thing you got that tool belt last Christmas. Now’s the time to dig it out.
Three Quick and Easy Home Improvement Projects
Give your house a spruced up look that’s sure to impress the in-laws with these three super simple projects. It may cost you a few bucks, but the awe factor will definitely be worth it.
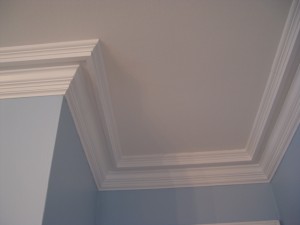
Beautiful crown molding dresses up every corner of the room. (credit Ken at MyFinishedCarpentry.com)
1) Crown Molding – Concentrate on the living and dining rooms for the greatest effect, but if you really want to impress, extend the trim to the guest bedroom as well. Crown molding goes up quick and is all about measuring, cutting and nailing. With a miter saw (or a hand saw and a manual miter box) and a hammer you can have this decorative trim up in a few hours.
Make sure you opt for a good quality finishing nail with a bright finish. Designed for a clean look and easily countersunk on your trim, a big five pound box of these will come in handy well beyond this quick project.
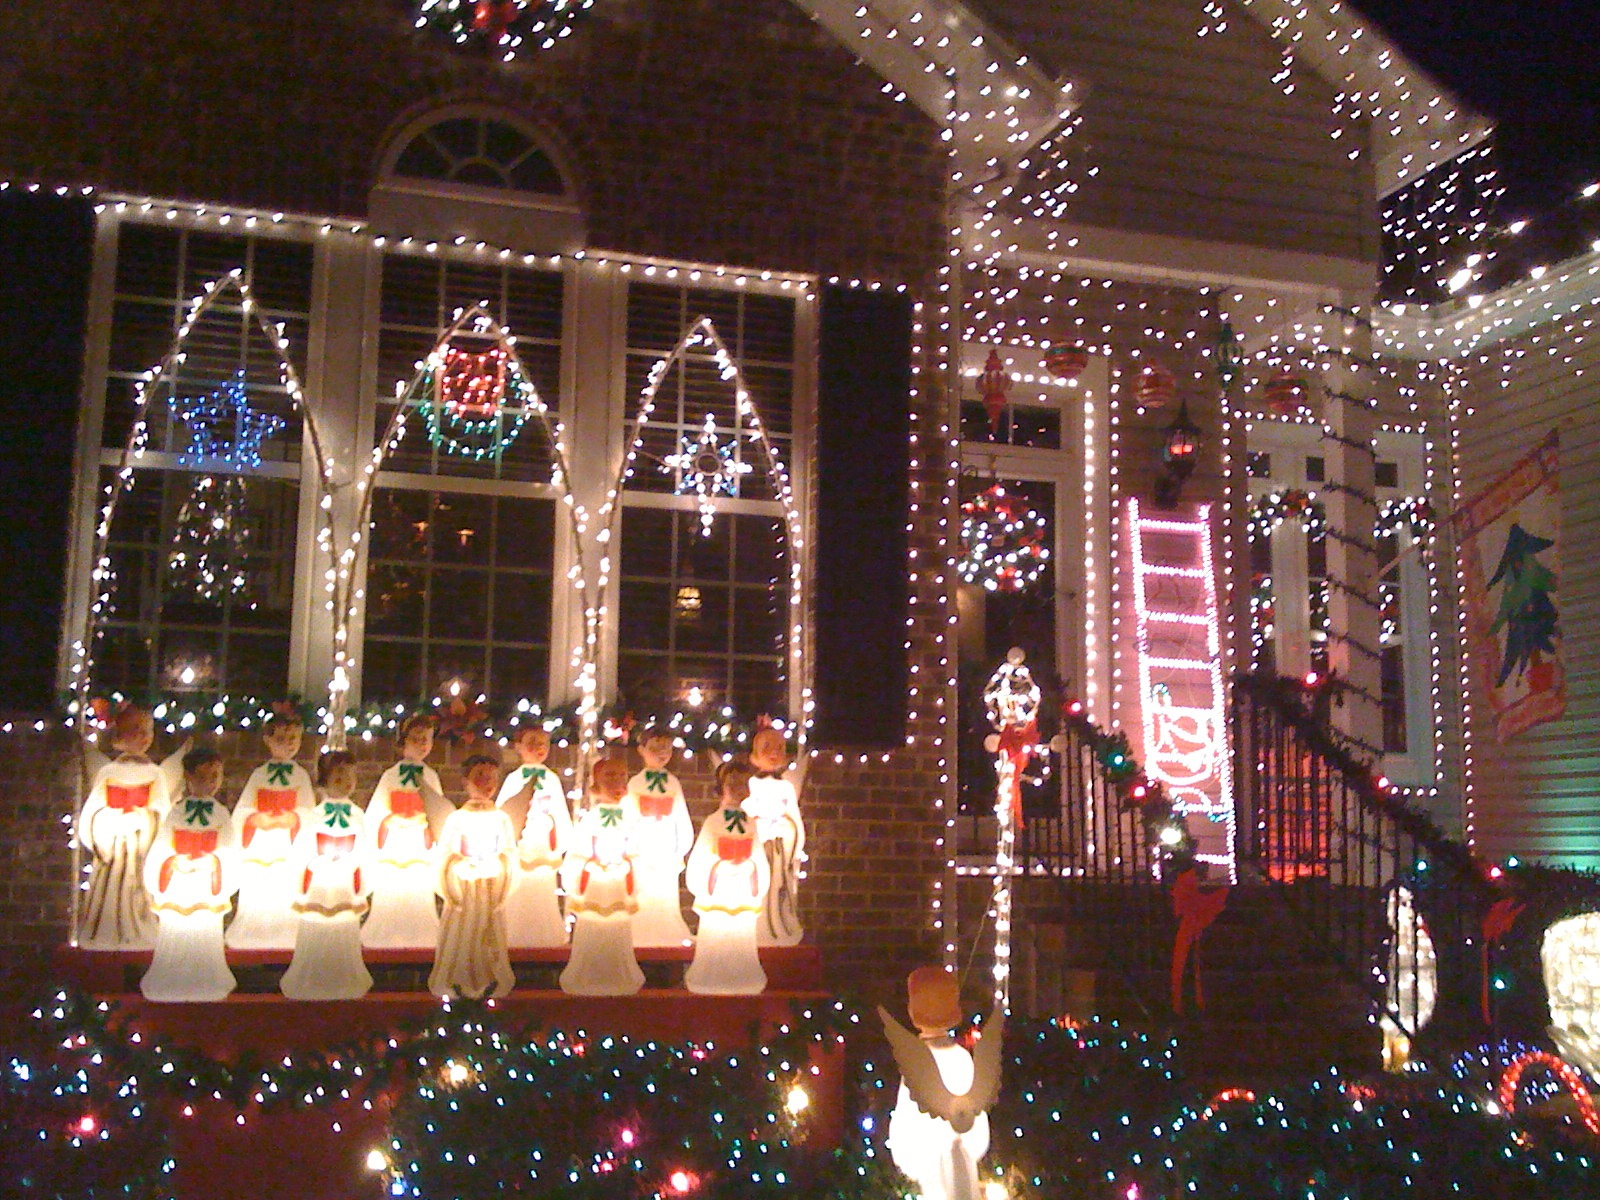
A little too much? Dress your porch up with taste.
2) Dress Up the Porch – Curb appeal carries a heavy weight at Christmas time. You can cover some of that worn and saggy railing with garlands, but your friends and family (and those caroling singers) are going to see the real deal when they coming knocking. Try sprucing up the railing with tempered glass sections or adding fascia board to the stairs. How about whipping together a nice new trellis on the wall using some lumber and a handful of deck screws? Or create an easy porch tree with a pyramid-shaped wood frame hung with garlands and lights.
Do this on a warm(er) afternoon and get the lights up at the same time. Bonus points for doing two holiday home improvement projects at once!

Painting an accent wall can add some flair to any room.
3) Paint It Up – This can be a quick project or an epic task, depending on the size of the room, extra trim and all of those other details. Gauge the space and figure out whether a fresh coat of paint will be worth the effort of prep, paint and clean-up. How about painting an accent wall or hanging a border instead? They’re quick and fresh (and easily removed, or painted over afterward if you’re not happy).
Why Bother?
When everyone gathers at your house for a holiday meal the table settings and culinary presentations take center stage. But when people come in from across the country (globe?) and are staying over for a few nights, your whole house will be on display. These quick fixes will give your place that extra special shine. They’ll also give you something to do on top of all the other madness the holiday season brings.
Now quit stalling and get to it. Oh, and Happy Holidays!
It may surprise you to learn that platings are used on almost 90 percent of all fasteners out there. Why? Because a plating on any fastener provides an extra level of protection, helps to control the torque and tension during installation and gives added strength. Platings also improve a fastener’s appearance – better than makeup, platings are more like a major facelift.
Commercial fasteners of all kinds are plated. Technically speaking, plating is the application or adherence of a certain metal onto the surface of another metal, often called the base. Different than coatings, which are generally chemically-based and much thinner, fastener platings are used mainly to resist fastener corrosion, although they offer other benefits as well.
Processes of Plating
Applying a plating is a complicated process that is usually done in one of three ways. For commercial fasteners you’re looking at electroplating, hot-dipped galvanizing or mechanical plating. All three are used in different circumstances and to varying degrees of success. Read on below.
Basics of Electroplating
A typical electroplating shop.
Start with the base metal. The product or fastener is then immersed in a water-based bath that also contains a concentration of the plating material in a chemical form. When an electrical current is passed through the water bath, those chemicals react by bonding onto the base metal.
What you get is a thin, shiny layer of plating that will provide protection against fastener corrosion for a limited time. Electroplating can produce coatings up to 0.00015 inches in thickness, which is much less than what hot-dipped galvanizing or mechanical applications can achieve. But for indoor use and where the initial appearance is important, electroplating is just fine. It’s also a cheaper alternative, which makes it a popular one as well.
Framing nails and interior fasteners are often electroplated. Look for a shiny finish and a lower price tag.
Basics of Hot-Dipped Galvanizing
The matte, dark gray color of hot-dipped galvanized plating.
It involves heat (obviously) and another bath, but hot-dipped galvanizing is distinctly different from electroplating and delivers better results against corrosion on most applications. A steel fastener is immersed in molten zinc that reads a temperature of 950 degrees Fahrenheit. In these extreme temperatures the zinc reacts to the steel and forms an iron-zinc alloy which heavily coats the metal.
Hot-dipped galvanizing creates a plating that is 0.0021 inches thick and can be up to 0.0034 inches on some applications. For small fasteners (#0 up through 3/8″) this process will result in too much build up, clogging the threads and rendering the fastener almost useless. It’s certainly the way to go on larger fasteners though and is used for exterior applications of all sorts. This process of plating produces a matte gray finish that will hold up well against corrosion.
Mechanical Applications

Automotive components are often mechanically plated.
Not as well known, mechanical methods of plating use pressure and impact to adhere the plating material to the fastener before a coating is cold-welded on to finish the job. Certain types of fastener materials are better suited to this process of plating. Aluminum automotive parts are often mechanically plated with a tin-cadmium alloy, providing superior protection and durability. It’s not a process you’ll find often in commercial fasteners, but mechanical platings are out there and certainly have their place.
Mechanical platings are done in a range of thicknesses, from 0.00015 inches typical with electroplating to the thicker hot-dipped galvanized finish of 0.0034 inch.
However it’s done, plating is a necessary process to extend the durability of fasteners and other metal products. It gives fasteners super strength and resistance, providing just what you need for your project.
It’s quiet, subtle and incredibly persistent, eating away over time and difficult to combat. Corrosion is the enemy of any metal joint, mechanism and structure. And when we’re talking fasteners, corrosion is the ultimate test of quality.
Think about it this way. Most fasteners are metal (sure, the plastic ones have corrosion beat, but give me steel when the pressure is on, for sure) and are used to connect or fasten two or more objects together. When corrosion breaks down the stability and strength of the metal, fasteners lose the ability to do their job.
Two Basic Causes of Corrosion
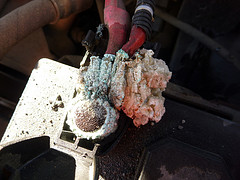
Corrosion on a car battery due to direct chemical attack.
In the world of rust you have two basic causes of corrosion – attack by a direct chemical and reaction through electrochemicals. Not very many home applications involve direct chemicals (such as hydrochloric acid), but it is much more common in the industrial arena. The petroleum sector, for instance, battles direct chemical attack on the metals and fasteners of distillation and refining tanks, tools and machinery. High heat can turn many different substances into chemicals that will break down the metal, like salt into hydrogen chloride and then into hydrochloric acid.
Solutions to Direct Chemical Attack
Engineers and designers spend hours of time researching and deciding upon the best fastener material for their application (and you should, too, for that matter.) A simple answer to the direct chemical attack problem would be to use fasteners made from metals that will not react to the guilty chemicals. But most of those are either too expensive or not strong enough to be used for fastening. Next option.

Guardrails, street lights, traffic signs and the fasteners that hold them together are all hot-dipped galvanized.
Plating is the most common solution when dealing with direct chemicals. Often a coating is used, but the amount of corrosion resistance is heavily dependent on how strong that coating is. Zinc is probably the most common material used for plating steel (most often referred to as electro-galvanizing), and while the finish looks nice, it won’t hold up against the elements. Cadmium plating is a bit more resistant but will also fail eventually. For ultimate chemical resistance, hot-dipped galvanizing or mechanical galvanizing is the answer. And then you may even find some polymer plating, although that tends to drive the cost up.
aaa
Electrochemical Reaction
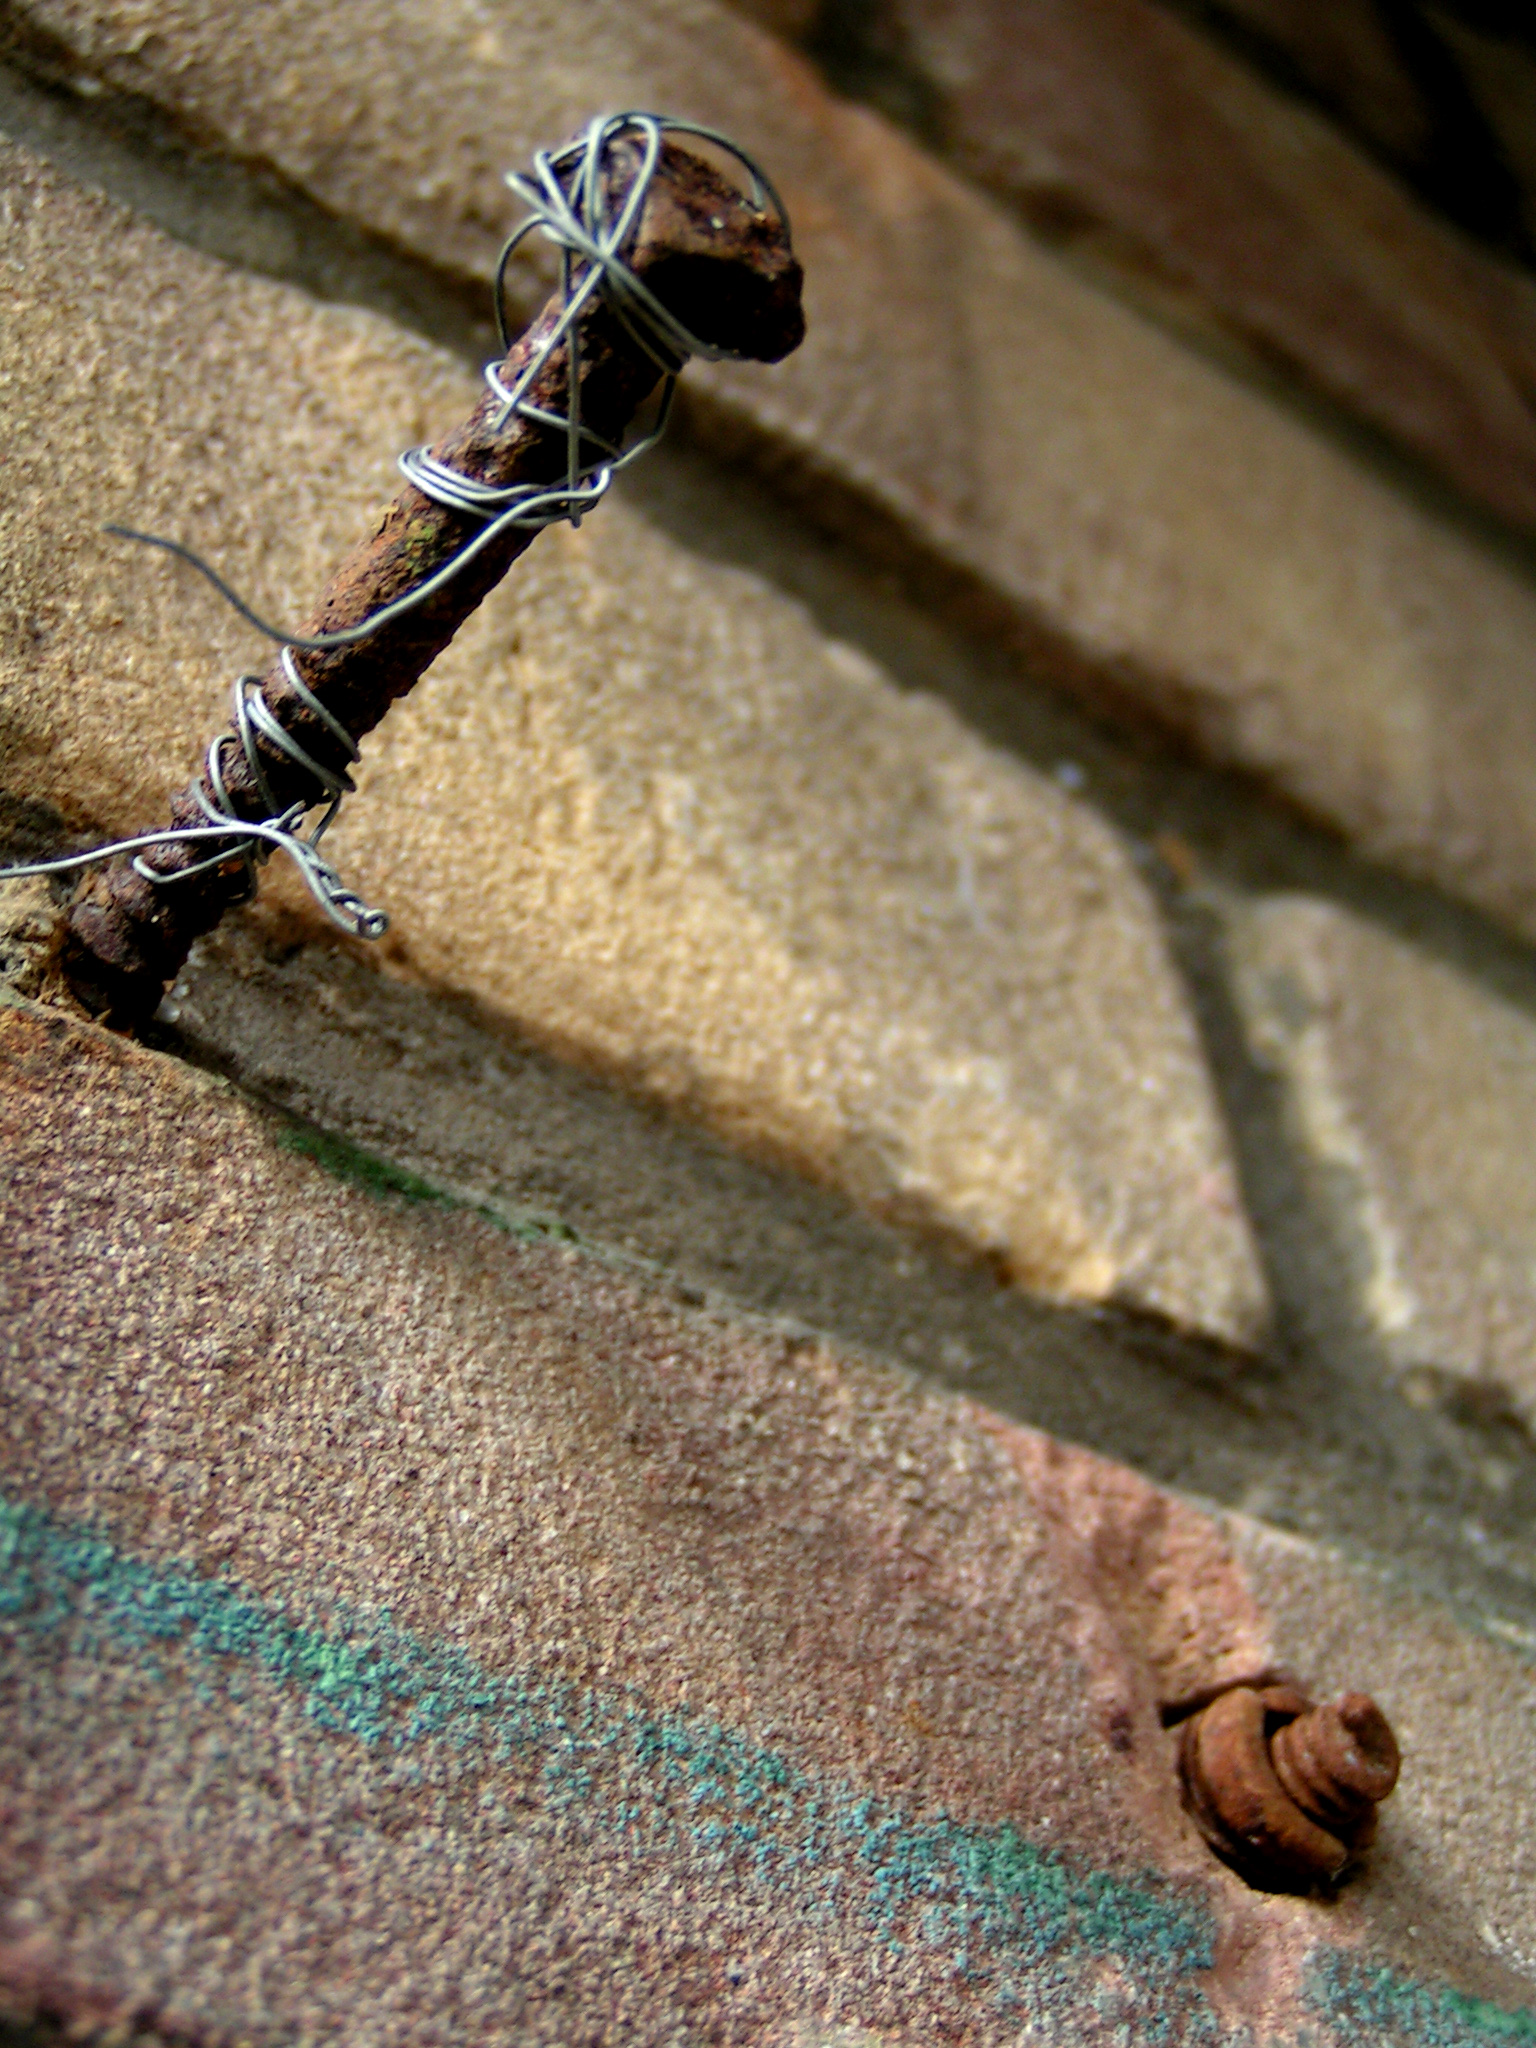
Rusty nails are an example of an electrochemical reaction.
Most of us know that steel rusts, but what’s actually happening in such cases is a reaction at an electrochemical level. By nature, the iron inside the steel is constantly attempting to revert back to its original state – iron oxide. When steel is made, the oxygen content is driven away, but a reunion is constantly on the material’s mind (sort of). And the natural tendency is to join together with oxygen again and form iron-oxide, or rust as we like to call it.
Steel nails in an old cedar fence or wheel nuts on your car tires are just a few common places where you can easily spot electrochemical reactions (rusting) at work.
Using Galvanic Corrosion as an Advantage
Galvanic corrosion is what happens when two metals that are incompatible touch and an electrolyte happens to be around. (An electrolyte is anything that an electrical current will flow through – moisture in any form, for instance.) Interestingly enough, in that situation and between these incompatible materials, one material begins to corrode quickly while the other is protected and experiences little to no corrosion at all.
This interaction is the principle behind galvanized or zinc-coated steel. These dissimilar materials have a reaction when exposed to an electrolyte (e.g. fog, rain, etc.) that causes the zinc to break down and corrode, leaving the steel strong and protected in a strange, sacrificial kind of way.
What Is the Result of Corrosion?
From an engineering standpoint corrosion is definitely to be avoided. Not only will it result in pitting (those nasty holes in the surface), but it can also crack through and generally spread across an entire surface, seriously reducing the strength of the material. Since metal corrodes from surface exposure, certain ways of combating corrosion involve covering up that surface. But that is not always effective and the fight to avoid or slow down this enemy continues on.
There are plenty more details and complexities involved in corrosion, including stress, temperature, fatigue and erosion. What you need to remember is that rust is a chemical reaction that can be delayed and at times avoided, but it must always be acted upon or it will, silently, do its dirty job of breaking down the material.
Roofing and siding projects have you working with a lot of different buildings materials – from wood to felt, metal to vinyl and maybe even some clay tile thrown in here and there. All of that variety requires a host of different specialty fasteners and all are designed to hold on and hold up for years.
Add in the fact that sealing against water is often an issue, and you’ll find that roofing or siding hardware gets some superhero qualities that make them as tough as… well, nails.
Roofing Projects
![]() Roofing Nails are sort of all purpose for this project. Use them to attach your roofing felt, insulation board, speed board or asphalt shingles. Available in hot-dipped galvanized or electro-galvanized, these come with a heavy barbed or ring shank and wide head for good staying power. As a bonus, you can use these nails on your siding as well.
Roofing Nails are sort of all purpose for this project. Use them to attach your roofing felt, insulation board, speed board or asphalt shingles. Available in hot-dipped galvanized or electro-galvanized, these come with a heavy barbed or ring shank and wide head for good staying power. As a bonus, you can use these nails on your siding as well.
![]() Roofing Nails can also come with a Neoprene Washer, which is a fancy little addition that works well with steel or other types of flat roofing to provide a water resistant seal. Look for brands that also carry a painted shank available in a variety of colors.
Roofing Nails can also come with a Neoprene Washer, which is a fancy little addition that works well with steel or other types of flat roofing to provide a water resistant seal. Look for brands that also carry a painted shank available in a variety of colors.
![]() Copper Roofing Nails are made specifically for use with copper flashing. They come with a wide head and are made with, you guessed it, copper.
Copper Roofing Nails are made specifically for use with copper flashing. They come with a wide head and are made with, you guessed it, copper.
 Metal Cap / Plastic Cap Nails are specialty products used for housewrap, felt or sheathing projects. They tend to have a ring shank and come with a wide plastic ring at the head for excellent holding power. Metal cap nails have the same distinct design but can be used for asphalt shingles and insulation as well and come with either smooth, ring or spiral heavy shank. The metal cap is also available in a square shape or round like its plastic cousin.
![]() Shingle Nails are used mainly for thinner, sidewall shingles and have a narrow, smooth shank to reduce splitting. The head is large and flat – perfect for easy driving.
Shingle Nails are used mainly for thinner, sidewall shingles and have a narrow, smooth shank to reduce splitting. The head is large and flat – perfect for easy driving.
![]() Lead Head Nails (not to be confused with Red Head Nails, my personal favorite) are used with metal roofing only. Like magic, the bulging head flattens on impact to form a seal on the metal roofing panels. They’re available in smooth or spiral shanks.
Lead Head Nails (not to be confused with Red Head Nails, my personal favorite) are used with metal roofing only. Like magic, the bulging head flattens on impact to form a seal on the metal roofing panels. They’re available in smooth or spiral shanks.
![]() Tile Nails are long and thin with a head that prevents the nail from getting lost in the pre-drilled hole of your Spanish clay tile roofing. Definitely a specialty product, but something you can’t do without when installing tile roofing.
Tile Nails are long and thin with a head that prevents the nail from getting lost in the pre-drilled hole of your Spanish clay tile roofing. Definitely a specialty product, but something you can’t do without when installing tile roofing.
Siding Project
![]() Shake Nails can be considered a roofing product, unless you’re installing the cedar shakes as siding. You make the call. Either way, these short nails have a small head and are concealed easily for a nicer finish.
Shake Nails can be considered a roofing product, unless you’re installing the cedar shakes as siding. You make the call. Either way, these short nails have a small head and are concealed easily for a nicer finish.
![]() Hardboard Siding Nails are another specialty product that comes with an extra rigid shank for superior holding power. With smooth, ring or spiral shanks, you can also find this nail with blunt points (to avoid splits) or oval heads.
Hardboard Siding Nails are another specialty product that comes with an extra rigid shank for superior holding power. With smooth, ring or spiral shanks, you can also find this nail with blunt points (to avoid splits) or oval heads.
When you’re working with wood shakes or shingles – especially cedar – it’s always a good idea to upgrade to stainless steel nails. Many of the top brands will offer a lifetime warranty on stainless steel nails used with cedar or redwood shakes and siding.
Refer back to Part 1 or Part 2 in this series to cover all facets of nails. Get all the nailing hardware and info you need for any project in your home.
After some great info in Part 1 about the parts of a nail, we’re going outside to look at specific nails made for outdoor construction.
You know what I mean – that fence, deck or patio you’re planning on tackling. Or the cedar shakes you need to get on the shed or gazebo. How about the chicken wire you put up around the garden or the retainer ties stacked up along the driveway? All of these projects require nails to keep them strong and stable, and not just any type of nail, but those made to withstand the elements.
Deck and Landscaping Projects
![]()
Patio/Deck Nails are available in a variety of sizes and gauges. This nail comes in both spiral and ring shank and is used to nail deck board and framing
![]() Patio Casing Nails are similar to a patio/deck nail, except this one has a casing or finishing nail head so that it can be countersunk. Perfect for railings and detailed trim work.
Patio Casing Nails are similar to a patio/deck nail, except this one has a casing or finishing nail head so that it can be countersunk. Perfect for railings and detailed trim work.
These are different than common nails for two main reasons: First, the shank on a decking nail is always spiral or ring. This is done to keep the nails from backing out once they’re hammered in. Spiral is best to use with the end grain. Secondly, and most important when you’re working outside, decking nails are hot-dipped galvanized (we previously talked about selecting the right material). Both of these processes give the nail material a rough exterior that acts like a protective barrier against corrosion. Heat-applied methods provide more zinc than regular electro-galvanizing does, creating a stronger, more weather resistant nail. Hot-dipped galvanized nails are also better to use with treated lumber. Be sure they are rated for use with ACQ (the most commonly used lumber treatment method).
Fencing
 Other than the fence nails and fence staples covered in Part 1, you might also need to use a chicken wire staple or poultry net staple. Attach those handy rolls of light wire to wood posts with this hardware and create a quick boundary for… whatever. Even if you don’t have chickens, chicken wire is extremely useful. Keep rabbits and other critters out of your garden, provide a structure for vines and other plants or simply put up a quick visual border in your yard.
Miscellaneous
![]() Timber Tie Nails are similar to a spike, but it comes in a shorter length and has a thinner shank for minimal splitting
Timber Tie Nails are similar to a spike, but it comes in a shorter length and has a thinner shank for minimal splitting
![]() Fine Nails are sometimes called “lobster pot” nails and have a thin shank that is ideal for thin, wood-like furring straps and even plywood (or if you happen to be assembling lobster crates, you’ve found the perfect nail). Good for cedar shakes, too.
Fine Nails are sometimes called “lobster pot” nails and have a thin shank that is ideal for thin, wood-like furring straps and even plywood (or if you happen to be assembling lobster crates, you’ve found the perfect nail). Good for cedar shakes, too.
Tool Stipulations
You may be using a certain tool for your outdoor project that demands a certain nails. Nail guns, for instance, often use coil nails – which are generally decking or fence nails attached with a thin bead of metal to form a coil. Other guns use a clip system. Find out from the tool manufacturer or operating manual exactly what type of nail is needed and in exactly what form.
Stainless Steel
For premium fasteners for outdoor construction, rely on stainless steel. It may cost you a little more, but the dependability and strength are well worth it. Decking and fence nails come in stainless, as well as common and box nails.
Check back for the last article in this series where we’re going to cover nails for those Roofing and Siding projects on your list.
Are you making your Christmas wish list? Looking to drop hints onto your clueless family members about what kind of birthday gifts to get you? Or maybe you just feel like going shopping (hey, I can relate to that!)
If you want to do a professional looking job on backyard construction projects (front yard, too, for that matter), there are certain essential tools needed. Sure, you can rent them. But wouldn’t it be more cost effective and downright convenient to have them tucked away in your garage, work shop or tool shed? Then you can pick away at these exterior DIY projects whenever you have the time (and energy).
Whether it’s a deck, fence, shed, patio or routine grounds maintenance, these tools are must-haves in any DIY enthusiast’s bag of tricks.
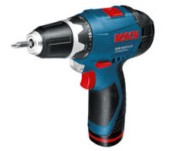 1) Cordless Drill – I remember a woman I knew who had an epiphany about this handy tool. She finally discovered that it wasn’t only a drill, but with the simple twist of a keyless chuck and change of bits, her cordless drill became a power screwdriver. What versatility! What practicality! You can learn from her and get one of these – an 18 volt model is preferred. And don’t forget extra Lithium Ion batteries and a dependable charger. Enough said.
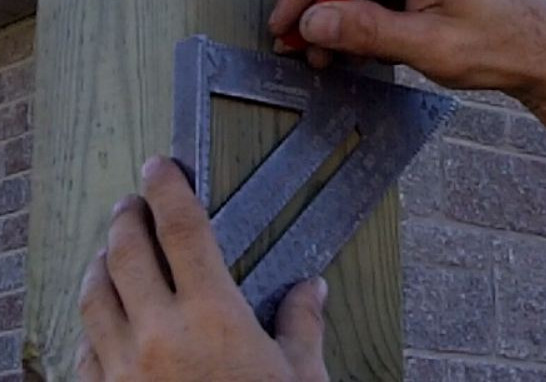 2) Speed Square – This handy measurement and marking tool is essential for all things construction related. If you will be building anything at all within your property, you’ll need a speed square. And a package of carpenter pencils to go with it. FYI – these make for great stocking stuffers.
 3) Laser Levels (and other laser tools) - Who doesn’t want a laser? I mean, these are fun and practical. How much better does it get? You can find torpedo laser levels for those tight jobs, rotary laser levels for all around fun and dot laser levels for targeting more than one point at a time. For backyard projects including grading, fences, walls and decks, the rotary laser level is likely your best bet. Don’t forget a tripod. And for even more space age fun and super accurate measurements, look at the Laser Distance Measure from Johnson. Worth every penny for getting distances bang on.
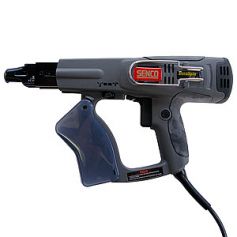 4) Screw Gun – This tool is essential, and not just because it make you feel manly to use a gun. This little baby will save you countless hours and enormous amounts of frustration as well. The Senco DS200-AC is a favorite, ideal for everything from wooden decks and fences to those drywall and flooring projects you’re planning inside the house.
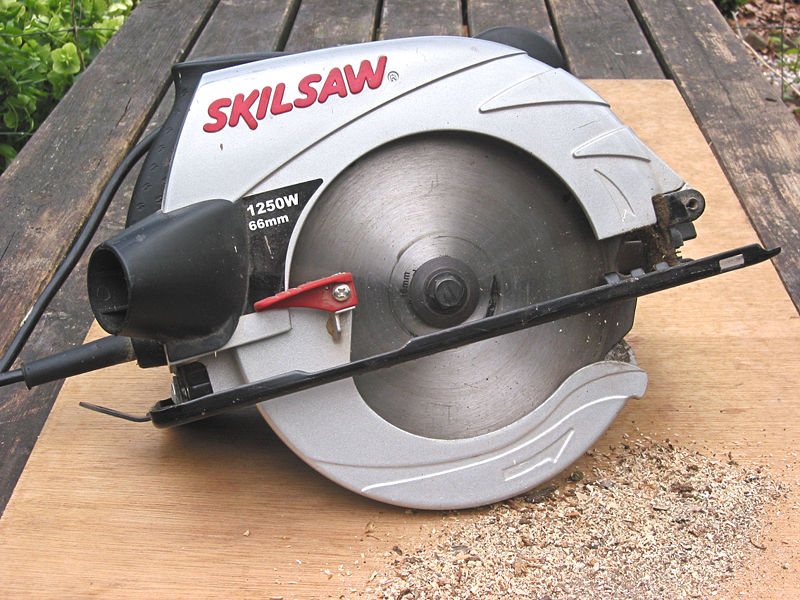 5) Circular Saw – Every carpenter or handyman needs a good circular saw. Heck, you really should have more than one. Cordless is best, although the blades are generally smaller than their corded cousins. Look for a brand that includes a laser guide to keep your cuts straight. And buy good, quality blades – you’ll never regret it.
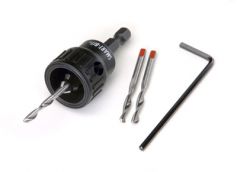 6) Specialty Bits – A masonry bit is handy to have for drilling through patio stones and other rocks. Want to make your own garden fountain? Get a masonry bit and have at it. If you have any ideas about working with composite or hardwood in your yard you will need a Smart Bit. For both pre-drilling and counter sinking, this item is worth its weight in gold. Maybe even more. The Smart Bit also eliminates that annoying characteristic of composites called mushrooming. For the smoothest, cleanest finish on your composite deck board a Smart Bit is essential.
There are a lot of other important tools for backyard DIY projects, but this list will give you a good head start. Print it off and tape to your fridge, kitchen cabinet or even the bathroom mirror. There are no extra points for subtlety. With these must-have tools in hand, it’s time to get cranking on that award-winning deck you’ve been dying to build.