
You sank the posts, built the frame and installed the deck board. Bravo. Now comes all of those little jobs that we affectionately label “finishing touches.” Basically that is everything that doesn’t fit neatly into its own category.
Maybe you don’t need a railing or stairs on your ground level deck. Or it could be that flower boxes are just not your thing. Maybe skirting is irrelevant (on walkout decks you aren’t going to bother) or fascia board is something you trimmed off the budget.
Or maybe you’re going to tackle all of these things. Good for you. Now get moving.
Railing
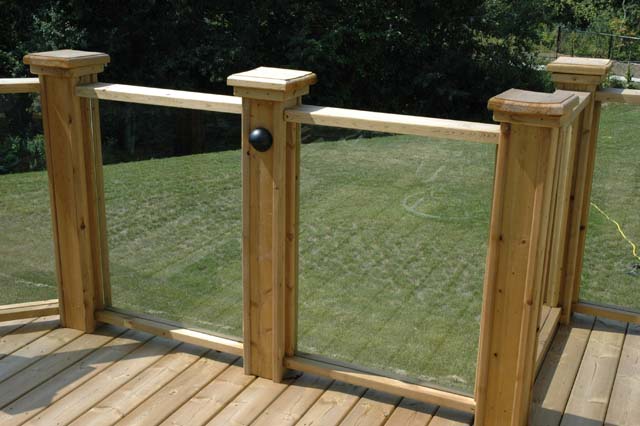
Tempered glass railing in a wood frame.
If your deck is more than 24 inches off the ground then you’re going to need a railing. There are plenty of options for the DIY deck crew, from the perennial favorite 2×2 pickets to a component aluminum system and even tempered glass railing. Pick whichever suits your style, house and budget.
Post spacing should be somewhere around 4ft on-center. Check with your local building code in case they give you more leeway. For convenience and comfort, you should look for a railing style with a top rail wide enough to set your drink on.
Pre-made steel, aluminum and glass sections will come with instructions. Follow them. And be sure to double check all of your post spacing before you start installing the sections. This is especially true if the sections were special ordered.
Remember that the railing on your stairway has an angle. Build the stairs first and again, double check your measurements.
Privacy Screens

Herringbone privacy screen with a decorative beam.
Essential for most yards in suburbia, a privacy screen is basically a fence installed on your deck instead of a railing. You can use 4×4 or 5×5 posts, 2×4 stringers/crossbeams and then either deck boards (5/4×6) or fence boards (1×6) for the privacy part. Create an interesting design with lattice or top the screen with a decorative beam.
Use your imagination and introduce some creativity here. It’ll give your neighbors something nice to look at instead of spying on you.
Stairs
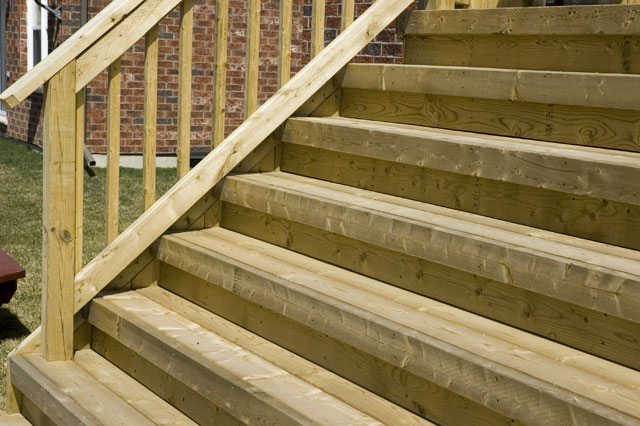
Deck stairs, up close and personal.
You can pick up stair stringers from the lumber stores (they come in wood or steel versions) or you can cut them yourself. Contractors often use 2×12 lumber and notch out a 9 inch wide run (the part that you step on).
Building stairs can get complicated, so pay attention. There are a lot of measurements and calculations you’ll need to do, but once it all comes together, it’s a beautiful thing.
A few important numbers to remember:
- Maximum rise (height of the stair) is 7 3/4″. Minimum Rise is 4″.
- You’re allowed no more than 3/8″ difference between rises on the stairway (that means you can’t get to the bottom or top step and just fudge it – all of the stairs must be equal height or within 3/8″ of each other)
- Minimum stair tread run (or depth) is 10″ – no maximum
- Minimum width of stairs is 36″ although recommended minimum width is 48″
- Stair Stringers must have a minimum depth of 5″ from the inside corner of the stair to the back edge of the stringer (use a 2×12 and this won’t be a problem)
- Maximum spacing in any one place between the stairs and the bottom of the railing is 6″
- Maximum spacing between stair stringers is 16″ on center – meaning on a 36″ wide stair, you’ll need four stringers
** Note ** These figures are pulled from the IRC (International Residential Code). Your best bet is to check with the local building codes to get the measurements relevant to your area. The golden rule is to always make the building inspectors happy.

Open faced stairs running down the front of the deck to save yard space.
You’ll need to measure how high off the ground your deck is. Divide that by 7 or 7 1/2″ – this will give you the number of rises. Don’t forget that the ground and the deck itself count as a rise.
Now take that number and multiply it by 10″ (or more if your treads will be deeper). That is how far out your stairs will go. If that distance infringes on your property line or anything else, you’ll need to install a landing in place of one rise and turn the stairs.
Don’t forget to include a flat space of at least 3 foot square at the bottom of your stairs. Patio slabs work just fine.
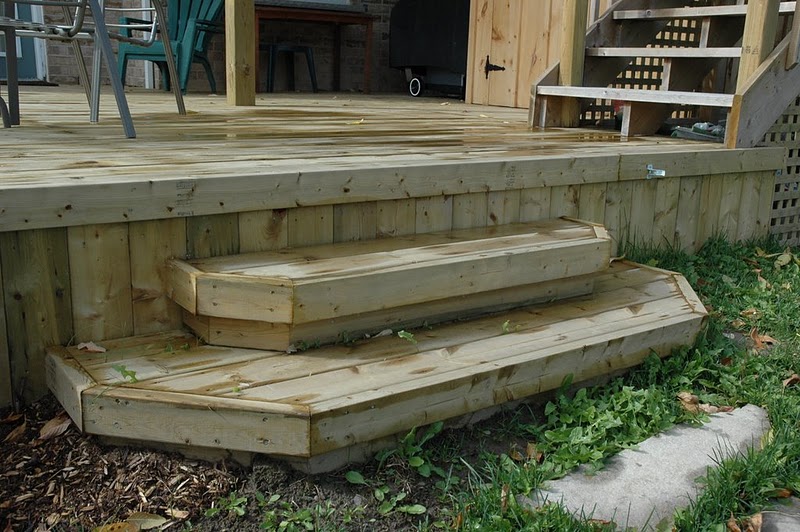
Angled box steps for easy stair construction.
For the treads you can use two deck boards butted together or one 2×10 cut to length.
If your deck is only a few feet off the ground you can save a lot of headaches by building box steps. These are literally small deck frames attached together and tied into the larger deck, creating steps to grade.
Flower Boxes
Build boxes from deck boards and install them permanently onto your deck as a patio garden. Or use tall flower boxes as railing and to flank the stairs. Don’t forget to install a liner designed to retain that valuable potting soil and water your flower boxes regularly.
Skirting
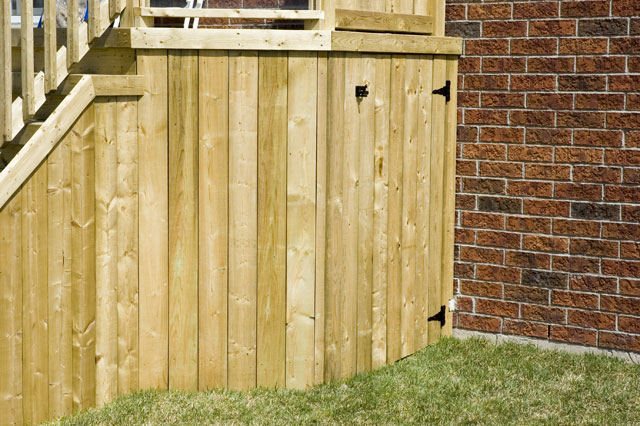
Vertical board deck skirting with gate.
Close off the space between your deck frame and ground with lattice or vertical board skirting. This will help keep the critters out of there and provide a neat and tidy appearance. If you drop something between the deck boards, skirting makes it a lot harder to retrieve, so hang onto your pocket change.
Skirting boards or lattice are attached to that ring joist you installed way back in step 2. They can be installed flush to the ground or you can excavate and bury the boards down a few inches. It’s up to you. Use the skirting as backing for a border garden and be sure to put a gate in somewhere. Use a gravity latch and simple hinges for the gate or just screw a removable section in.
Fascia Board

2x4 makes for a nice profile on your fascia board.
A 2×6 or 2×8 board nailed along the outside of the ring joists to cover up the ends of your deck board may seem unnecessary but it will give your deck a profile that looks professional and classy. Go ahead and skip it if you want, but this finishing touch is simple to do, carries a small price tag and delivers an impressive look.
Personalize your deck with any or all of these finishing touches. This is the stuff that will set yours apart from the other decks in the neighborhood and make the space feel like home. Take your time, check your measurements and have fun.
Then congratulate yourself. You just built a wood deck to be proud of!
Trackbacks & Pingbacks