Step 2 – Framing For Fun
So you have your posts in, rock solid 4×4s or 6×6s ready to hold up your deck framing. Now it’s time to put together a frame in the right shape and size for your dream backyard deck.
Maybe you’ve planned for a multi-level design or are getting ambitious with a rounded front or an octagon inset. Whatever your dream is now is when it starts to take shape.
Ideally you’ve either used quick-setting concrete for the posts or have let them set for three to four days. So get to it already. Framing for a medium to large sized deck should take anywhere from a half to a full day for completion.
Start Against the House
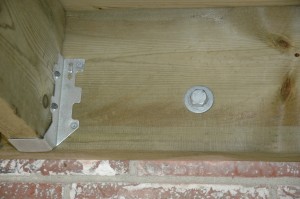
Attaching or hanging the ledger board against your house is the important first step. Get out the level and 1/2” x 10” stainless steel carriage bolts. You’ll need to go through a 2×8 and into the foundation, securing your deck frame to the house. Use the appropriate washers and nuts to tie it all together.
On a walkout level deck this essential fastener will connect the 2×8 ledger to the inside framing of your house, traveling through the exterior finish whether brick, siding or stucco.
From the Ledger Out
Once it’s up and secure, nail joist hangers onto the ledger every 16”. Be sure to use 1 1/2” nails (sometimes called joist hanger nails) that are rated for use with today’s pressure treated wood. All framing hardware and fasteners need to be hot dipped galvanized (at the very least) in order for them to last when in contact with ACQ lumber treatments. Even if your decking is composite, cedar or another type of lumber, the framing is almost always built out of treated wood.
Galvanized is the basic stuff. If you want real dependability, opt for 18-8 or 316 stainless steel. You’ll get your money’s worth in longevity and strength.
Beam Me Back to the Posts
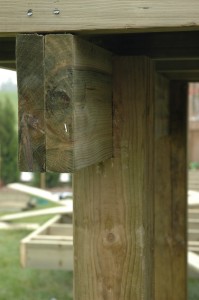
At a level just below the ledger board, attach the beams to your wood posts. Use laminated beams (two 2×8 boardsnailed together and notched onto one side of the post with 5 or 6” wood lags) or double beams (2×8’s attached to either side of the post using 3 1/2” wood lags). Contractor opinion is split between the two methods and both deliver a strong, stable support for your joists.
Just Joists Left
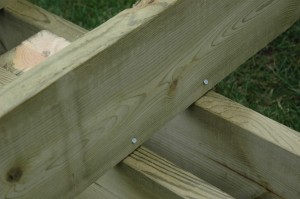
After the solid beams are up, all that’s left of the framing is joists. With their ends sitting in the joist hangers and running parallel to rest on top of the beams, your joists can be 2×6 or 2×8 dimensions. Toe-nail them into the joist hangers and into the beams. Space joists no more than 16” apart and run the rim joist along the outside edges, using joist hangers again for a tight fastener fit.
Fancy Framing
If you’re doing multiple levels or inset shapes, treat every level like its own mini-deck. Build your beams and a joist system to provide the support needed for each individual level. With the deck board and railing installed, they will come together to form one flowing deck.
Rounded fronts are done by creating an arch shape with different joist lengths, notching the backside of the ring joist and bending it to fit around that arch. Measure twice or three times and cut once for the simplest installation. Use lumber that’s slightly wet for an easier bend and you’ll probably need to nail the ring joist directly into the end of the joists.
Once the framing is done, fancy or not, the basic shape of your deck is laid out for you to see. Get a good visual and lay down any gravel or landscape fabric you want underneath. Now you’re ready to really see the deck take shape.
Step 3? Installing the deck boards is next on our list, so stay tuned.


